A textbook is not a mystery novel. It’s perfectly okay — and even ENCOURAGED — to skip to the end of the chapter/book to see how things turn out.
Here are eight tips for how to read a college textbook:
After reading the title of the chapter, read the chapter preview. In here, you’ll typically find a list of objectives for the chapter, which will let you know what to focus on as you proceed.
Flip through the entire chapter, reading the headings and subheadings only.
Read the chapter summary at the end of the chapter.
Take a look at any discussion questions provided by the author.
THEN, and only then, go back and read through the entire chapter once. Read it beginning to end, without taking notes. Yes, I said to NOT take notes the first time through. Your goal here is to get a complete view of the chapter’s information.
After your complete read through, then go back to the beginning of the chapter, taking notes on the important parts. How do you know what’s important? You will know this by what you have seen in the summary, headings/subheadings, summary and discussion questions.
Finally, even if it’s not required by your professor, create learning journal entries for the chapter by answering the discussion questions. (Definitely use the textbook to help you answer these questions; this is not a test.)
And my eighth and last tip is that if you have an enhanced e-book (rather than hard copy), the publisher often provides practice quizzes and additional resources. Take advantage of them — you’ve already paid for them!
What other advice would you offer to a college student who is reading a textbook?
For this assignment in PRCM 2400, you will choose and interview a public relations professional.
In our course in Canvas, submit a Word file with your 500-word (minimum) recap of the interview. In addition to the recap, you’ll need to provide me with the PR professional’s contact information (name, title & company, phone number and e-mail address) at the top of the first page, before your recap of the interview.
Due Date: See our course in Canvas
You may conduct this interview face-to-face interview, via Zoom or phone. An interview that is e-mail or text-based only isnot acceptable.
Schedule your interview at least a week before this assignment is due, preferably two. PR professionals sometimes have unpredictable schedules, and it’s possible that you may need to reschedule.
Include an introductory paragraph that introduces the PR professional, including title and company, educational background, etc. Mention your connection to the professional (how you found him/her) and how you conducted the interview (face-to-face, Zoom or phone).
After the interview is over, send your interviewee a thank you note. Handwritten and snail mailed is preferred; emailed is acceptable.
Questions/Topics you need to ask/include:
What’s a typical week like? (If no week is typical, then what was last week like?)
Tell me about a project you worked on that you are especially proud of.
What do you do to keep current in the PR industry?
What do you wish you would have known before starting your career in PR?
How important is writing in your career?
What are your thoughts on the importance of thank you notes?
What three tips would you offer someone just starting out in PR?
Additional required information to include in your paper
After interviewing this person, are you (the student, not the practitioner) more or less likely to want to have a career in PR? Why?
What did you write to your interviewee in your thank you note?
Some questions you may wish to ask:
Did your education prepare you for working in PR? How?
What has surprised you the most about working in PR?
How has PR changed since you entered the field?
How does technology affect your daily work?
When your company is hiring for an entry-level PR position, what makes a candidate stand out?
What professional organizations are you involved in? (For example, PRSA, IABC, etc.)
Ask for feedback on your resume
Some things you may wish to do:
Include a photo of your interviewee. (This can be a photo he or she provides or one that you take yourself.)
Link to your interviewee’s LinkedIn profile and/or blog.
Questions?
[NOTE: This must be an informational interview that you conduct this semester. Do not “recycle” an interview that you conducted during a previous semester.]
Even though most of us are beginning to return to the office now, virtual training sessions will continue in many organizations. Here are 10½ ways to help you get the most from a virtual training session.
Book time on your online calendar so that others in your organization will know you are unavailable during the training time. PRO TIP: Add in an extra 15 minutes after the class for your own reflection and wrap-up notes on the training.
Let others in your home or office (ones who don’t have access to your calendar or who you know won’t bother to check your calendar) know that you will be unavailable. PRO TIP: I like to put a sign on my office door letting people know I am in training and when I will be done.
Minimize your distractions. PRO TIPS: Close all browser tabs except for the one(s) you will need during training. Turn off notifications to your computer, phone and watch — if at all possible.
Hydrate! PRO TIP: Have easily accessible double the amount of water you think you might want to drink during the training time. (See Water and Learning: Does Staying Hydrated Help You Learn? for more information on hydrating is important for your brain.)
Move around. Yes, I know this might sound counter-intuitive. Unless your training requires you to have fingers on the keyboard constantly, stand up and stretch often. And when there is break time, walk around your office or home, rather than staying at your computer. PRO TIP: Use a standing desk. I almost can’t recall what it’s like to work while seated all day. (See Movement and Learning for more information on how movement helps your executive brain function.)
Ask questions. For most synchronous training sessions, you will have the opportunity to ask and answer questions either via chat or by voice. PRO TIP: Even if you aren’t able to ask questions live during the session, jot them down as they come to mind, as you may be able to ask them after the session.
Do your prework. Pay careful attention to any emails you may receive from the trainer, as you may need to follow specific steps prior to the training session. PRO TIP: Do the prework at least a day before the session, just in case you run into any issues with software installation, etc.
Show your face by turning on your webcam. For smaller virtual training sessions, your trainer may want to see your face as you are participating in the course to help determine where possible areas of confusion are. PRO TIP: Blur your background if what’s behind you might be distracting to others.
Provide feedback. The best trainers will ask for feedback both during AND after the session. PRO TIP: Be candid in your feedback so that the trainer fully understands what you learned and how you felt about the training.
Take handwritten notes. Research has shown that when you take handwritten notes, you paraphrase more than when you type your notes. Paraphrasing helps you retain the information longer than typing verbatim. PRO TIP: Plan ahead to have fresh pens (in multiple colors, if you’re like me) and a nice notebook handy. (See New Findings Inform the Laptop versus Longhand Note-Taking Debate for more details.)
10½. Never EVER rely on the session recording. Even if the trainer lets you know that the session is being recorded for your use after the class, technology sometimes fails. PRO TIP: Participate in the course as though there will be no recording to review afterward. You don’t want to wish you’d paid better attention during the live session.
What other tips would you share on learning the most in a virtual training session?
An interview is a two-way street; both the interviewer and candidate are trying to learn as much as possible about each other in a short period of time to determine if there is a fit.
Sometimes job candidates get so wrapped up in trying to develop stellar answers to questions they anticipate being asked that they neglect the flipside of that: coming up with great questions to ASK their interviewers.
Below you’ll find a list of questions to put in your (metaphorical) back pocket the next time you’re being interviewed. Many thanks to colleagues and friends who helped me pull this list together for you. (PRO TIP: Write down your questions before the interview.)
What’s different about working here than anywhere else you’ve worked?
How has the company changed since you joined?
Why do most employees leave the company?
What could you tell me about the company that I couldn’t find out by Googling?
Tell me about the team that I would manage.
Is this a newly created role? If so, what led you to create the role? If not, tell me about the shoes I would be filling.
What else can I answer for you to help you make this hiring decision?
Tell me what your onboarding process is like for new employees.
Which other teams in this company would I be working most closely with in my new role?
What types of professional development opportunities does your company provide?
What can I do in the first 90 days that shows you made the right decision to hire me? (Ashleigh Rankin)
What specific challenges or problems you would like me to address immediately? (Jack Leblond)
What is the most impactful action a new associate can take in their first 30 days in the role to be successful? (Stephanie Haney)
Tell me about your most successful employees and what they do that makes them so successful. (Ryan Shea)
And ALWAYS remember to ask this question: What is your timeline for the next steps in your hiring process?
As I sat there in the pre-dawn hours at my in-laws’ home in Biloxi a few years back, sipping my coffee in the dark, listening to nearly a dozen relatives snoring (mostly) quietly, I began to reflect on Thanksgiving and what it means to me. And inevitably, I started making connections between this traditional large family meal and my college classes. Why? I don’t know. But it popped into my head, so I went with it. I started thinking . . . what has Thanksgiving dinner taught me that has made me a better communicator? And this is what I came up with.
2020 Update: Scroll to the Gravy section of this post to see an addition.
Turkey: The best turkey I ever had was a deep-fried one. Mmmm. But boy oh boy can deep frying a turkey be a dangerous task. In my classes, sometimes I like to walk on the edge a bit with our discussions. I must always remember to keep the metaphorical fire extinguisher nearby, just in case of explosions.
Cranberry Sauce: It doesn’t all need to be sweetness and light in my classes. I can be tangy/tart and get some points across even better. I just need to watch for my snark level getting too high.
Dressing / Stuffing: Just like some folks prefer stuffing (cooked inside the turkey) and others prefer dressing (cooked outside), my students have preferred learning styles. If I want them all to learn, I need to offer both.
Rolls: At our house, the rolls were often an afterthought. Sometimes we baked them halfway through the meal and served them almost at the end. Great teaching ideas sometimes crop up last minute, too.
Gravy: The first time I had Thanksgiving with my in-laws, I saw my soon-to-be mother-in-law making hard-boiled eggs. When I asked, “What are the eggs for?” she looked at me quizzically and said, “For the gravy, of course.” It was that day that I learned that some of my preconceived notions about how things should be done were way off base. The gravy — hard-boiled eggs, giblets & all — was wonderful. Sometimes I need to add something a colleague suggests, something that may seem off-base to me at first, into my classes just to mix things up a bit.
Gravy 2020: The way we communicate has changed dramatically over these last few months, months that have felt like decades. The way we’re “supposed to” talk with our loved ones has shifted from face-to-face to masked face-to-face or Zoom calls. But that’s not all bad, you know? I have reconnected with several longtime friends over weekly virtual happy hours and with numerous cousins over Facebook, and for this I am grateful.
Green Bean Casserole: Has there ever been a tastier, yet less attractive, side dish? Sometimes the methods I use in my class may seem a bit slopped together, but I promise there is a method behind the madness, and it will all come out “tasting” wonderful in the end.
“Uncle Oscar”: I think everyone has that one relative — we’ll call him Uncle Oscar here — who you invite to dinner knowing full well he will attempt to monopolize the dinner conversation. Consider making placecards and assigning seats for dinner. Whoever had the pleasure of sitting near Uncle Oscar last year gets to sit at the opposite end of the table this year. And in class, when I have an Uncle Oscar — the student who feels compelled to answer EVERY question I ask — I do my best to ask questions in a way so that Uncle Oscar doesn’t get the opportunity to answer first, at least. For example, I may say, “Let’s hear from two or three people who went to high school outside of the state of Wisconsin,” knowing full well that Uncle Oscar is a local boy. Or “Let’s hear from the last person to take his or her seat in class today.” And many times, I’ll have whoever has just answered a question choose who answers the next question. This helps us hear from more voices and learn from more points of view than just Uncle Oscar, no matter how smart or sweet he is.
Black Olives: As I was growing up, my mother would always open a can of black olives and leave it in the fridge before Thanksgiving dinner. It always brought us into the kitchen so we could snitch an olive or two and chat with her while she was cooking. Similarly, I leave a basket of candy in my office at all times. (I’m not confident my students share my affinity for black olives!) Some of the best conversations I have with my students are when they just happen to pop by for a Fireball, Nerds or a Snickers bar.
Dessert: My favorite part of Thanksgiving dinner is eating pie for breakfast the day after Thanksgiving. In my classes, I often like starting with the fun stuff first, especially when the previous class (meal) was a bit on the heavy side.
Leftovers: With every Thanksgiving dinner, at least every Nixon one, comes leftovers. Lots and lots of leftovers. Well, we often have planned-overs (we cook extra of some of the food with intentions of having it for another meal later). I frequently give students bite-size chunks of information on one day that I intend for them to repurpose another day in class. The key is getting them to remember the information from the previous day. If anyone has tips for this, please share!
So what has Thanksgiving dinner taught YOU about being a better communicator?
For almost six years, I’ve been the only remote member (employee, then contractor) for my company. Though I used to work in our office in Arkansas when I lived in the area, my family moved back to Wisconsin, and I was able to continue my position remotely. Not only do I live 750 miles away, at times I feel even further away.
Then, COVID-19 hit. My office in Arkansas where everyone but me worked suddenly shifted to 25 separate home offices. My co-workers were now remote, too.
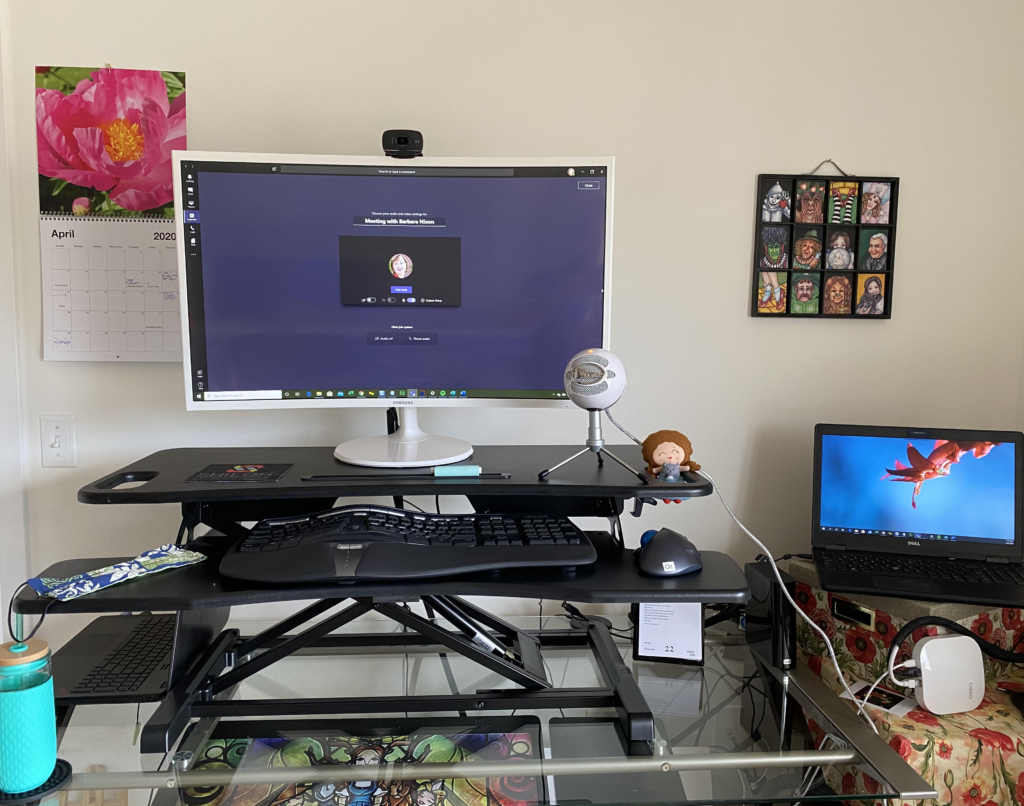
Our video calls over the past two months have been SO helpful for me to engage with my co-workers. Previously, we communicated primarily via email and phone calls. The calls were primarily conference calls where I was on speakerphone with a roomful of folks in a conference room. Not being able to see faces while we talked, knowing everybody else could see each other, was challenging at best.
“Most of our social roles happen in different places, but now the context has collapsed,” says Petriglieri. “Imagine if you go to a bar, and in the same bar you talk with your professors, meet your parents or date someone, isn’t it weird? That’s what we’re doing now… We are confined in our own space, in the context of a very anxiety-provoking crisis, and our only space for interaction is a computer window.”
So even though I have greatly benefitted by video calls with colleagues, I can relate to the content in this article. I know my colleagues, who aren’t used to working from home, are already suffering a bit from the energy drain of being on camera multiple times a day.
My Advice: One thing that helps me is that I only do work video (Zoom, Microsoft Teams, etc.) calls from my home office. And I always do social calls from elsewhere in my home — kitchen, living room or sitting area in my home’s entryway, depending on who I am talking to.
What kinds of things are you doing to help avoid burnout from video calls?
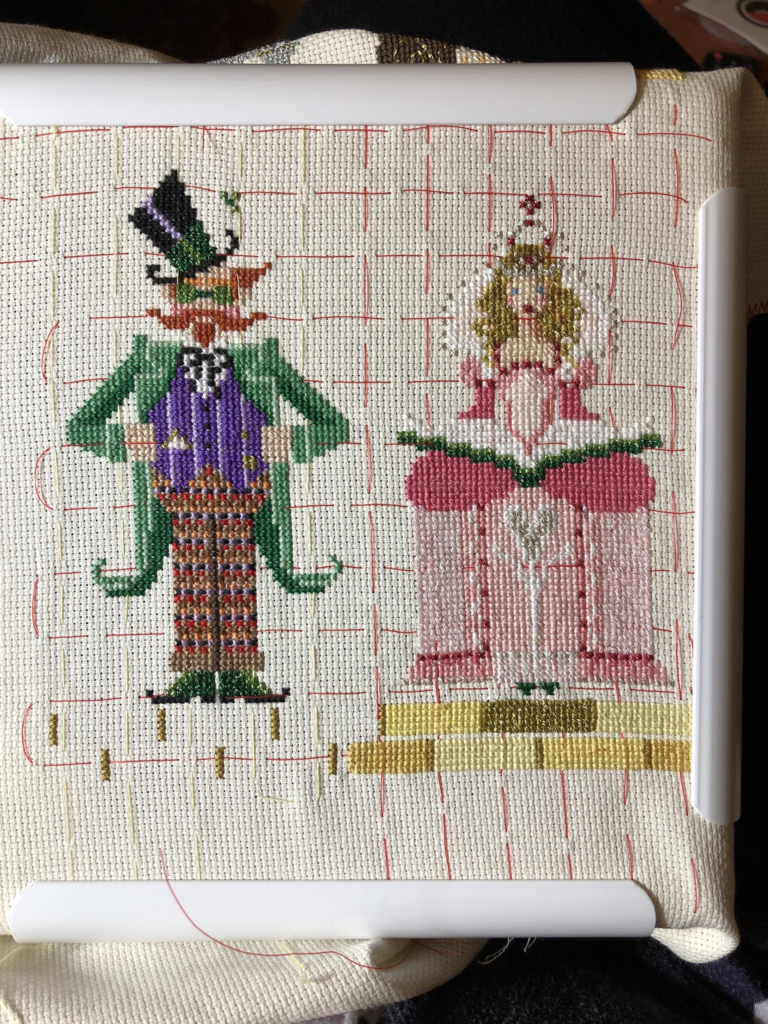
Over the last few years, I’ve rediscovered my love of cross stitching. Below you’ll find 15 tips & tricks that I want to share with you, whether you are brand new to the art of cross stitching or you’ve been cross stitching most of your life. Wherever possible, I’ve included links for you to find the sites and products that I suggest.
#1 Use Great Needles
Though the rest of these tips aren’t in any particular order, this one is my absolute number one tip. Until just recently, I was unaware how the quality of my needle would affect my cross stitching enjoyment. Inexpensive needles tend to lose their sheen after a few hours of stitching, which makes them drag through the fabric. On the other hand, needles like those from Bohin stay shiny and smooth even after 100 hours of use. There are a variety of sizes, and my favorites are size 26 (for 16- or 18-count fabric) and size 24 (for 14-count).
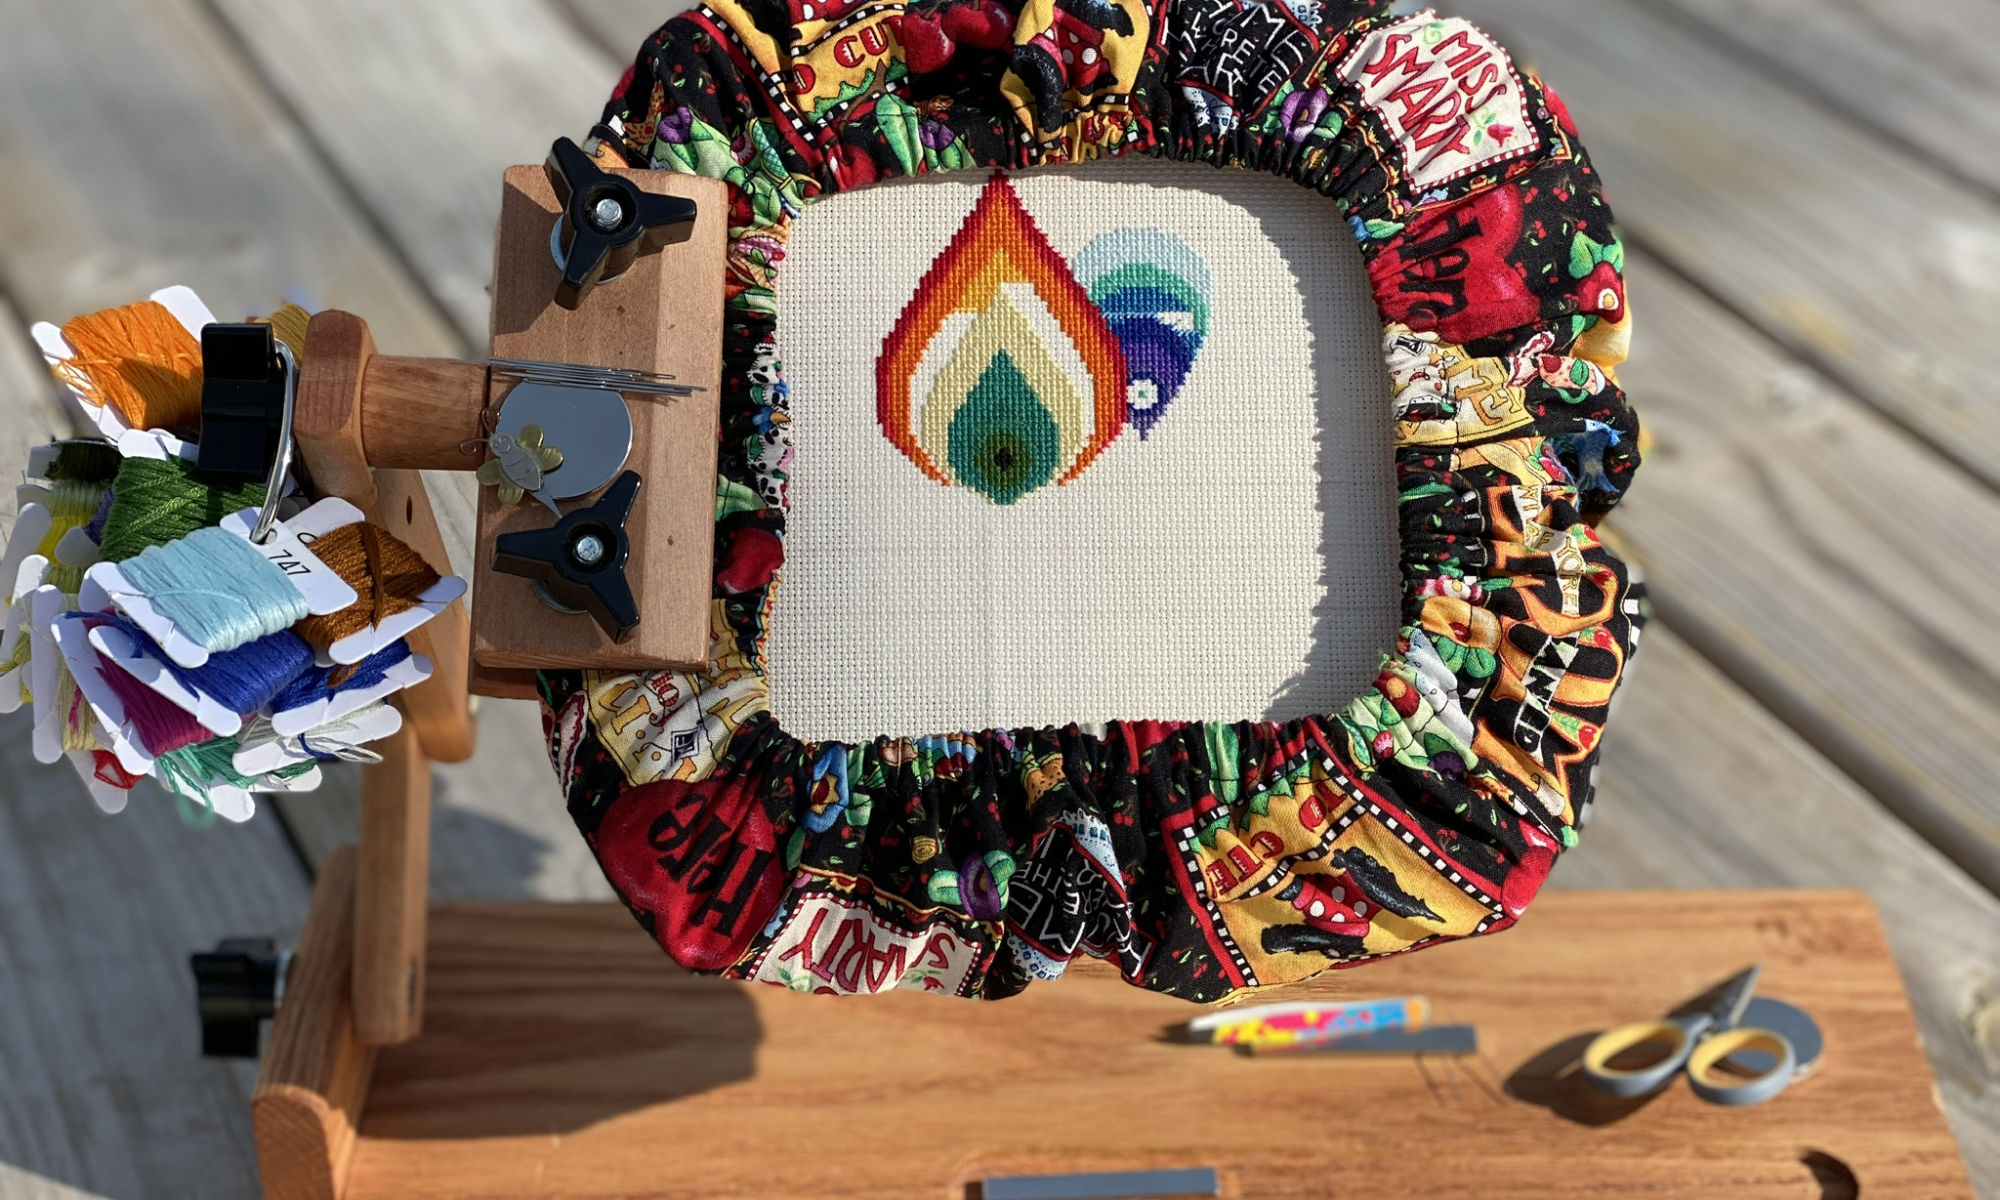
Q-Snaps
Like most cross stitchers, I started out using a simple hoop with an adjustment screw for making sure the fabric stays tight for stitching. Now I use Q-Snaps, a tube and clamp frame. I find that these hold the fabric even tighter, which I love. Sometimes when they are, they even hold TOO well. I discovered that sliding the grippers off of an end is much easier than trying to pull them straight off.
After using my first Q-Snap for about a year, I noticed that the grippers were a little looser than they used to me. To fix this, I just cut four 2″x4″ rectangles of white felt, and placed the felt between the grippers and the fabric. Problem solved.
Make a Grime Guard
To keep my fabric clean while I am stitching, I make grime guards. Grime guards go around the edge of your Q-Snap or hoop to protect your fabric from, well, grime.
If you are trying to determine what color floss to use for a custom project, try this DMC Color Picker. You upload a photo or graphic, then use the picker tool to show you what color a specific area is. You can also enter the RGB color values, and it will show you which color DMC most closely matches. I’ve used this tool often when designing a chart based on a customer’s logo.
Purchase Floss Inexpensively
Years (and years and years) ago, I used to own all the DMC colors, thanks to an anniversary gift from my hubby. But four kiddos and a dozen moves later, I was only able to find one of my boxes of floss. One Facebook cross stitch group I am a part of recommended trying out CXC floss, which has color numbers that match DMC, but are a fraction of the cost. I figured, what the heck? Let’s try it out. And for $.08 a skein (instead of ~$.50 a skein), I purchased 250 colors from Factory-Shop on Aliexpress, and it cost just $28.00. I find the CXC quality to be just about the same as DMC, and for some colors, it’s even better.
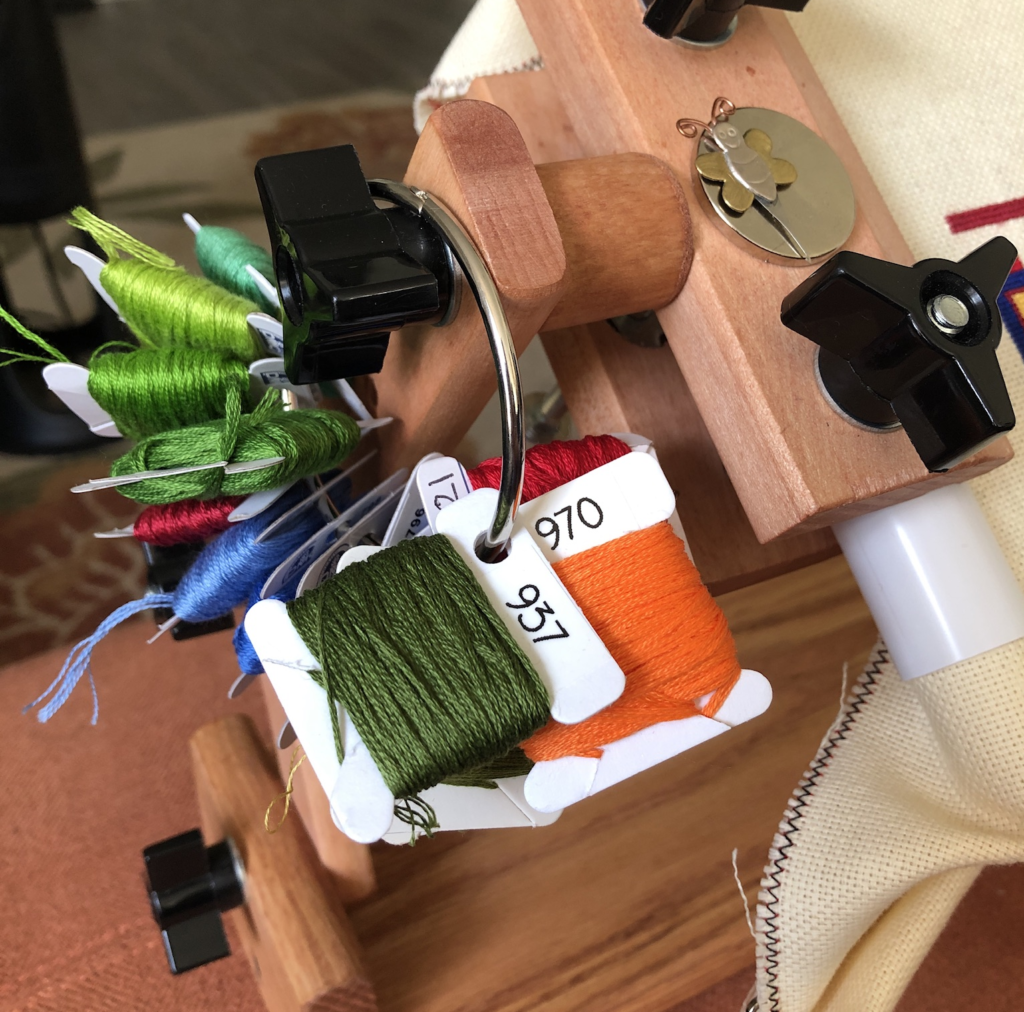
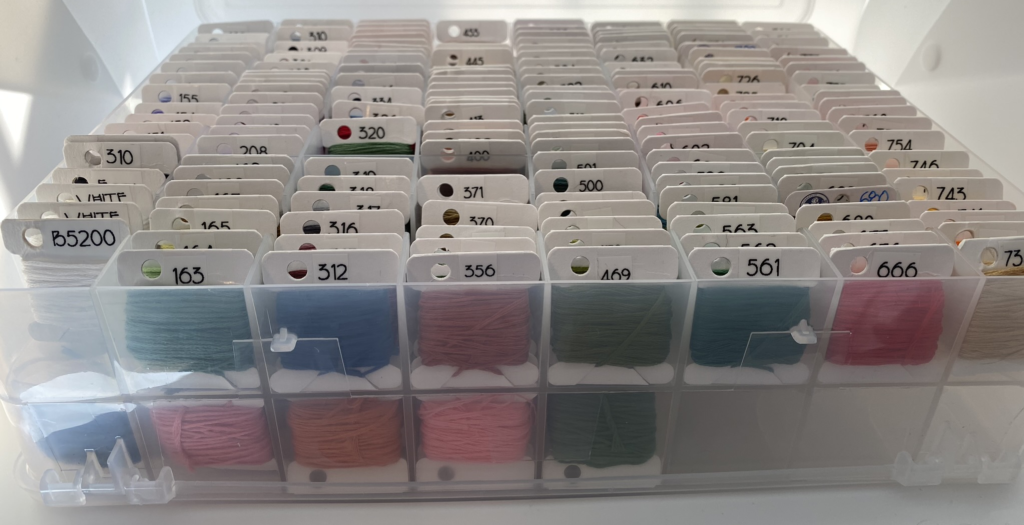
Bobbinate
There are a variety of ways to organize your floss, and my preferred method is to wind the floss around cardboard or chipboard bobbins. I like being able to put all the colors for a project on a split ring to keep them in numerical order. (This also makes it easier when it’s time to return the bobbins to my stash for the next project.) DMC used to make cardboard bobbins that were sturdy and easy to write on with a pen or Sharpie. The newer DMC cardboard bobbins are super flimsy and bend easily. And DMC’s plastic bobbins have two problems: I can’t get any type of pen at all to write the numbers on them without rubbing off, and the slit for the floss tail is so wide that the floss keeps unwinding on its own.
The bobbins I now use are Floss Keys from Crazy Annie’s Stitchin on Bonanza. They are made of chipboard (thick cardboard) and have the hole for split-ring storage on the side. Having the hole on the side makes it easier to write on, especially if you have like large handwriting like me. The tail of the floss stays tucked in nicely, too.
I store my bobbins in double-sided boxes, and my complete set of DMC/CXC colors fits easily in two $14 Creative Options 5315 Thread Organizer boxes. Note: to make the floss keys fit nicely, you need to lean your bobbins back just a wee bit, as the lid won’t close if they are perpendicular.
Oh, and to number my bobbins, I used my Brother P-Touch Cube Smartphone Label Maker. I like this model because it lets me upload my own fonts for the labels. And it makes it easy to save my labels so I can do another printout for a friend quickly and easily at a later time.
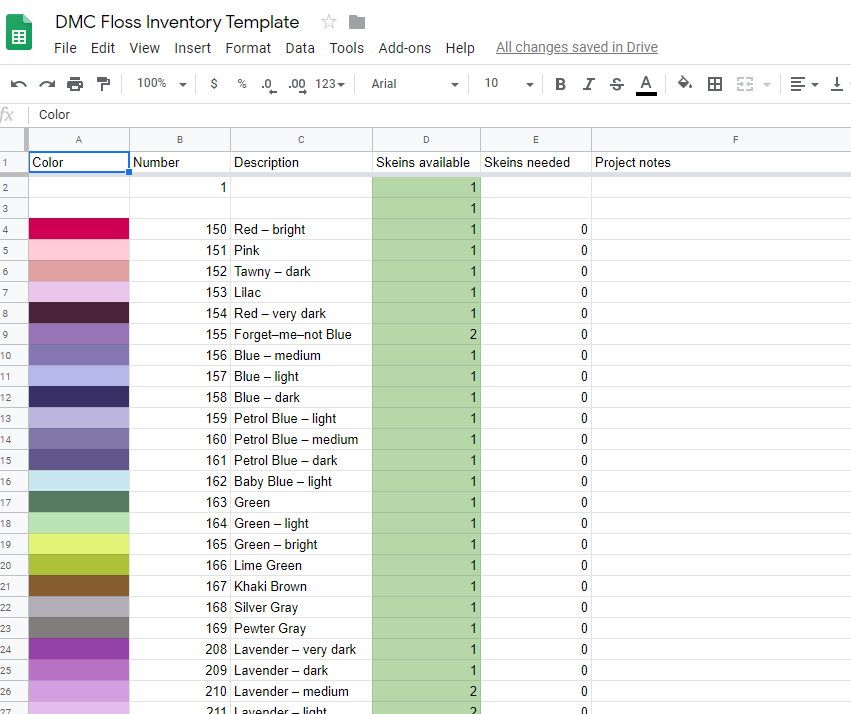
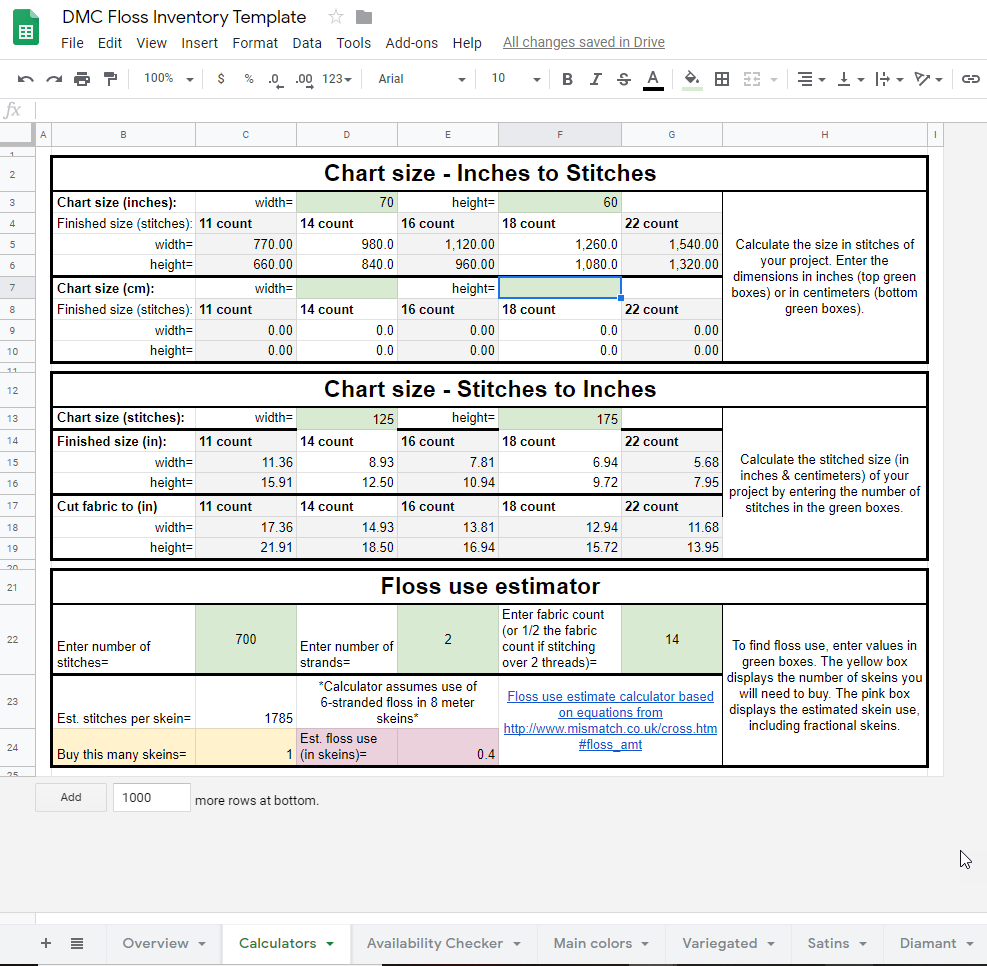
Keep Track of Your Floss Colors
Before I had a full set of floss, I would often purchase a color while I was out at Jo-Ann or Michael’s, only to discover I already had that color at home. Enter technology!
PDX Stitch has a Floss Inventory template that works perfectly for me. I spent about an hour entering which colors I owned (by just putting a 1 in their appropriate cells). Then when I want to get started on a new project, I’ll just type in the color numbers onto the Availability Checker, and the inventory sheet will tell me which colors I have and which I still need.
Find a Similar Color in Your Stash
I normally like to use the exact colors that the designer recommends. But if you don’t have all the needed colors, try out Thread Bare’s Closest DMC Thread Color Lookup Tool. It will not only give you options for colors, it will show (roughly) what those options will look like. Maybe you can find a similar color in your stash, so you can get started on your project more quickly and inexpensively.
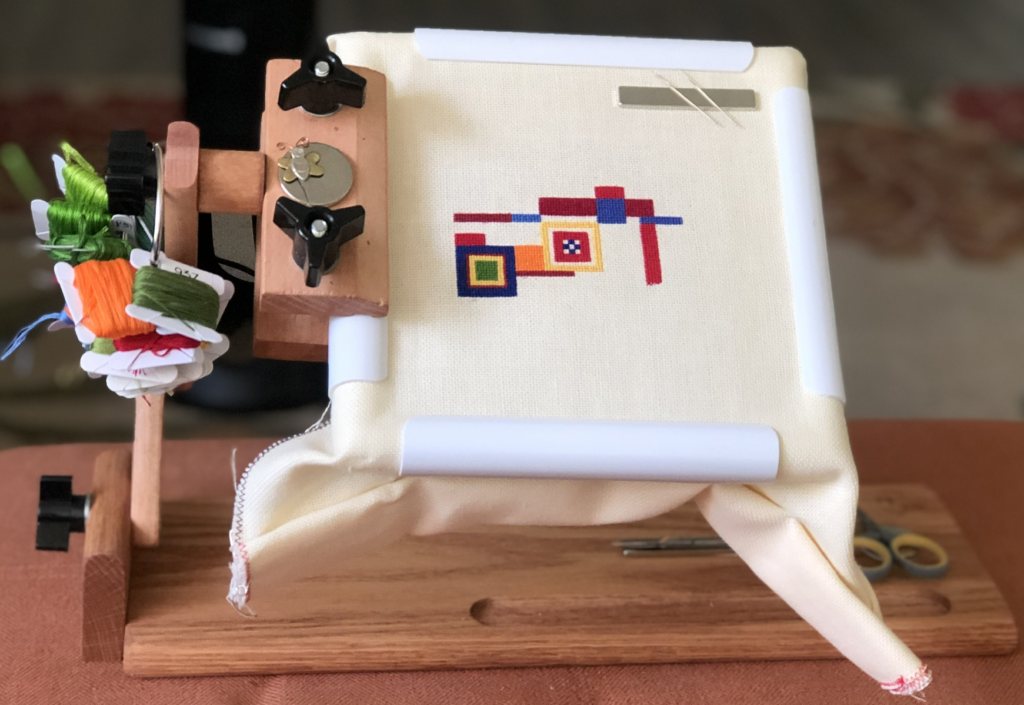
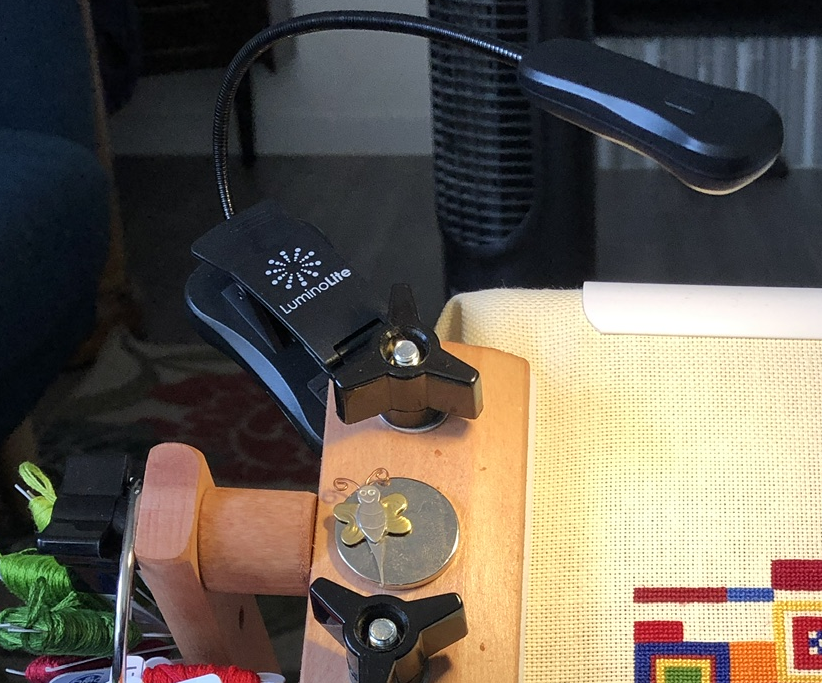
Lap Frames Are Wrist-Savers
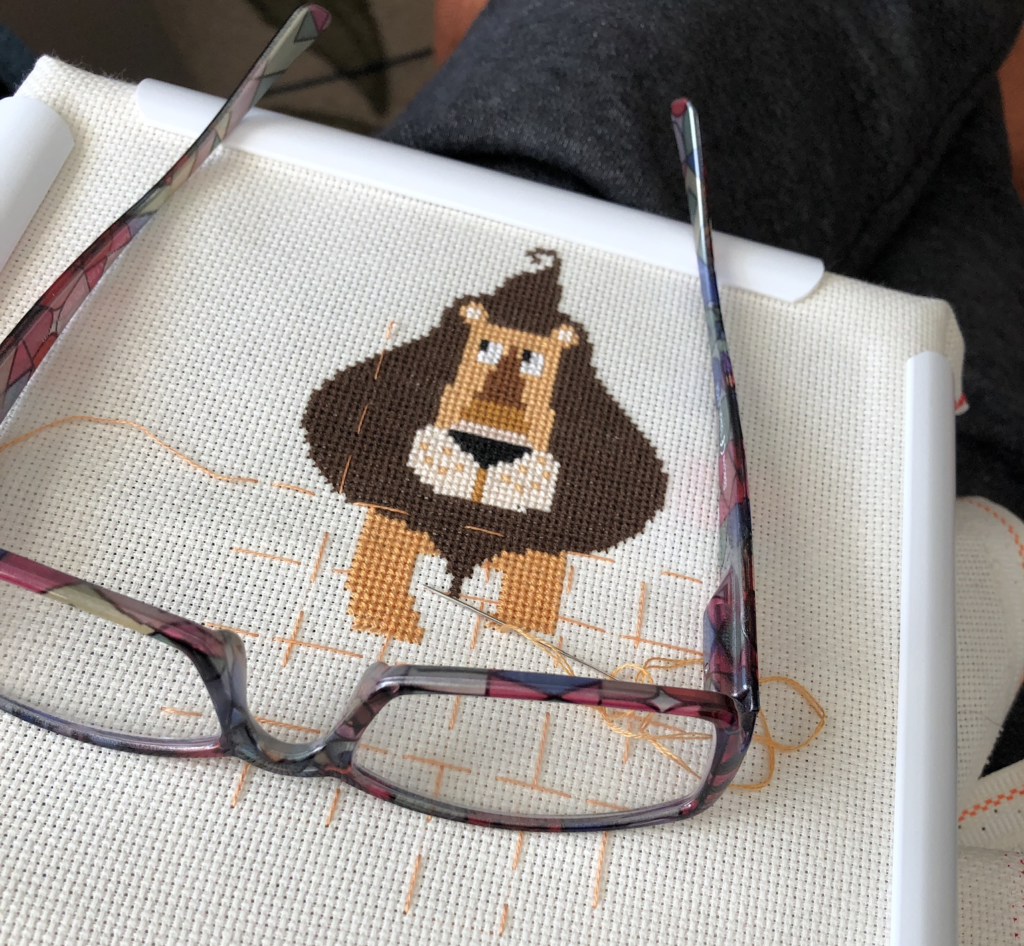
I used to get a cramp in my left wrist from holding my hoop. Not any more. I now use the $57 Ks Creation ZFCL Z Lap Frame with Clamp. It sits easily in my lap, and it holds my Q-Snap along with my rechargeable book light. To get to the back side of my project, I just need to loosen one of the nuts, and the project easily flips to the back. I like that it can fold just about flat for travel, too.
Light the Way
As I move through my middle years, my eyesight isn’t quite what it used to be, so I need more light to cross stitch than I used to. Since I like stitching while watching movies or TV, I don’t want to have bright overhead lights on. And the Ottlite I purchased sometimes would be annoying for family members who were watching TV with me. Then I found this amazing little, $14 lightweight light (Vekkia Rechargeable LED Book-Light) that clamps to my cross stitch stand, Q-Snap or hoop. The description says it stays charged for 60 hours, though my mileage has varied from that; I usually plug it in at the end of every evening of stitching.
Grid Your Fabric
When I first started cross stitching in my teens, I had no trouble at all keeping track of where I was on a chart. I never even would mark my progress. Fast forward a few decades, and life changed. I’m not quite sure why, but it became harder to put a project down and then know where to start back up the next time. Yes, there have always been 10×10 gridlines on most charts, but not on the fabric.
If I want to do a project on white or ecru Aida cloth, I now purchase pre-gridded fabric, like this Zweigart 14-count Gridded Aida or DMC Aida 18-count Magic Guide Gridded Aida. My 10×10 squares are visible in a light red, and this red washes out in warm water when I am finished with the project.
If I want to do a project on a different type of fabric (like Lugana or linen) or a color other than white or ecru, I will grid my own fabric. This takes a LOT more time than using the pregridded fabric, but saves time in taking out stitches that I have accidentally put in the wrong place. For directions on gridding your own fabric, see Peacock & Fig’s blog posts. NOTE: Do not ever use regular pencils for gridding; they rarely erase 100%. (Trust me on this.)
Starting & Ending Your Floss
Another game changer for me when I started back crossing stitching again after a few decades away is this: there are new ways to both start and end your floss! (The old style way to start was to leave a short tail behind as you brought your needle through the fabric, then do your best to catch this tail as you made your Xs. The old style way to end was to bring your needle through to the back, flip your hoop, and then run your needle under a few stitches to secure the floss before snipping it off.)
To start and end floss, I now use the loop start and pin stitch end. The video below shows how these work quite well:
Protect Your Edges from Fraying
After you have been stitching for a bit on your fabric, you will likely notice that the edges of the fabric will begin to fray. You have a few options to help avoid the fraying:
Use painter’s tape (not duct tape, as it’s too sticky and will leave residue)
Leave Room
When using your own cloth (not cloth from a kit), be sure to cut it so that you’ll have about 3″ (~8 cm) on all sides of the design. This is for two reasons:
To attach your Q-Snap or hoop and have enough room so your stitches aren’t uncomfortably close to the sides
To have room for framing
If you use the DMC Floss Inventory Template I recommended earlier, there’s a Chart Size Calculator for various thread counts on the second tab. I use this ALL the time.
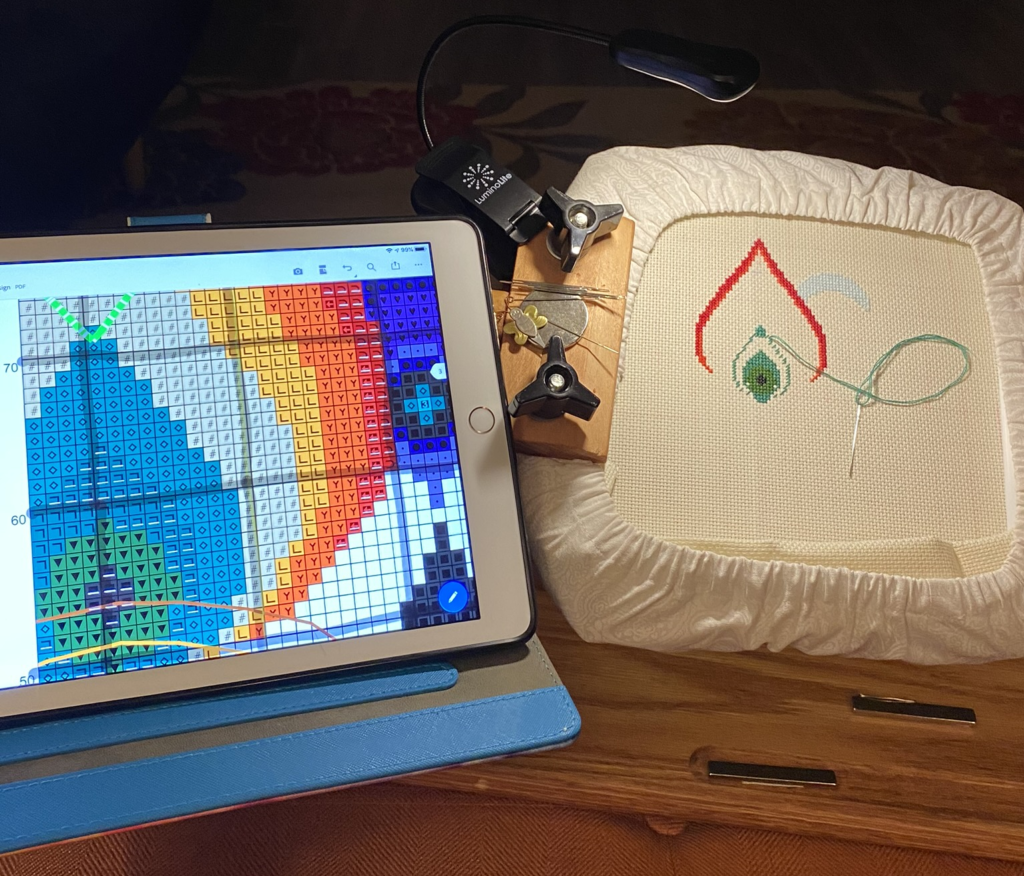
For Digital Patterns, Use Your Tablet
I used to be a paper kinda gal when it came to my patterns. Not any more. I love being able to always have my patterns with me, wherever I go. And even better, I can zoom in on the pattern to make it super-easy to see the design. I can even cross off the sections I have completed.
There are lots of apps out there for using your patterns on your tablets; see Lord Libidan’s blog post for suggestions. I’ve tried several of them, but keep going back to good old Adobe Acrobat.
Sometimes the grid lines don’t show up as clearly as I like, so I just use Adobe Acrobat’s highlighter feature to draw them in on my own. It’s not pretty, but it works great.
In Closing
I hope you found some of these tips helpful. What other suggestions do YOU have for making your cross stitching more enjoyable? I’d love for you to share them in the comments.
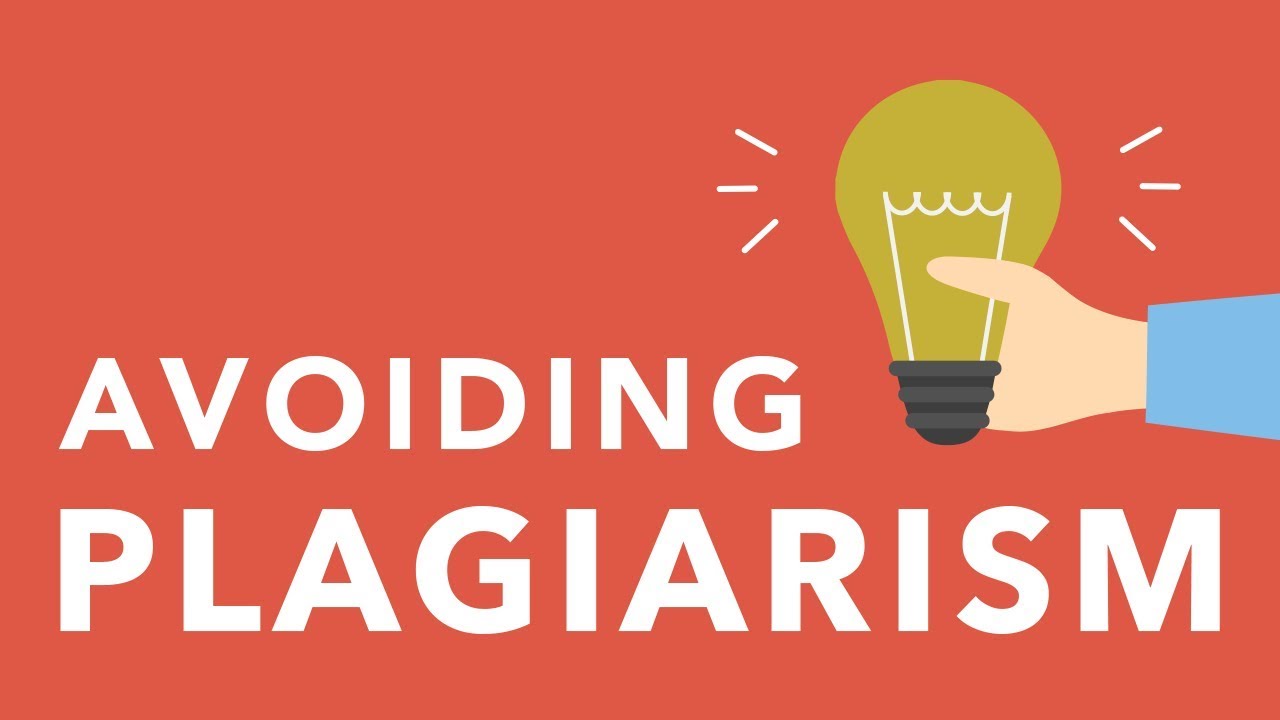
According to the Ashworth College Handbook, “Plagiarism is an act of taking someone else’s words or ideas and using them or representing them as one’s own work. This includes not properly citing the source of the words or ideas” (2019 Ashworth College Catalog, p. 58). Most colleges have a similar definition.
What’s the most common mistake that Prof. Nixon sees in assignment submissions?
The most common mistake I see in submissions is failing to put quotation marks around direct quotations. Even if you cite the source afterward, if you fail to include the quotation marks to show that the words are not your own, it’s a form of plagiarism.
Why is it important to tell your readers/listeners where your information comes from?
There are numerous reasons.
It makes you sound trustworthy and credible to your listeners.
It provides credit to the authors of the information you are sharing.
It helps your listeners to do their own further research on your topic.
If you don’t cite your sources, it’s plagiarism. And plagiarism can lead to failing an assignment, failing a course, or even being expelled from a college. (See your own college catalog for specifics.)
How do I cite my sources on a reference page?
At the college where I currently teach, we use the American Psychological Association format, otherwise known as APA style. APA has some extremely specific guidelines that we must follow. Luckily, there are some places you can go for help with APA style.
My favorite place for learning how to use APA format is Purdue University’s Online Writing Lab. If you learn better by watching a video, the lab offers one on YouTube.
The part of APA to be most concerned about for the courses I teach is making a list of your references, as much of APA style has to do with writing longer papers, and not really for writing outlines and speeches. (Check with your own professor to see if this is the same for your courses.)
If you’re still struggling with formatting your references in APA style, visit Citation Machine. This website, which has both free and paid offers, lets you enter a URL for a source, and then it pulls in the information it needs to cite the source properly.
I’m writing a speech script. Do I have to cite sources in it, too?
Yes. You won’t put the author’s name and the page number in parentheses, as you would in a paper, because that would be awkward to say aloud.
The best advice I’ve seen on how to seamlessly weave your source citations into your script comes from Bucks University. Take a few moments to read the article Citing Sources in an Oral Presentation.
Where can I go for help to make sure I don’t plagiarize?
Your college will likely have a writing lab of some sort that can assist. Check with your professor for suggestions.
It’s been forever since I had to write a speech or paper. How can I make sure I don’t plagiarize?
In brief, tell where you got your information from, both in the body of your speech or paper and on your Works Cited / Reference page.
Use quotation marks if you choose to use the exact words of a source rather than putting the information into your own words.
Make sure that every source mentioned in your assignment appears in the Reference page, and that every source in your list of references appears in your assignment.
Do I just put a list of the URLs that I used at the end of my assignment to show what sources I used?
No. You will need to briefly cite your sources in your assignment (paper or speech script), and also provide a list of the sources you used at the end on a References page.
Yikes. I just got feedback from you, and you told me I plagiarized. I didn’t mean to do it — I just didn’t know better. What do I do now?
First, (if you’re one of my students) read through the complete message you received from me.
Second, take a deep breath.
Then, if the plagiarism occurred on your first submission of an assignment, some colleges offer you the opportunity to revise for a potentially higher grade. Please do this if the option exists for you!
Are there different kinds of plagiarism?
Yes, and they are all treated similarly at many colleges. At Ashworth College where I currently teach, with your first assignment that has plagiarized material in it, you will receive an Academic Warning. If there is a second one, you will go on Academic Probation. And if there’s a third, it’s likely you will be dismissed from the college. Check your college catalog for specifics.
If you’d like to learn about the different types of plagiarism, see the Turnitin article The Plagiarism Spectrum.
What questions do you still have?
Do you still have questions? Your best bet is to contact your own professor. But if you have a general question, I am happy to assist. Just comment here.
In the almost four decades that I have been teaching college, one of the changes to how we teach that I appreciate the most is the use of rubrics for assignments. For professors, rubrics are helpful to ensure consistency in grading, for example. And for students, there are three times you would benefit from reviewing the assignment rubric.
FACT: I’ve never heard of a student earning a lower grade on an assignment as a result of referring to the rubric. And I’ve evaluated hundreds of thousands of assignments.
Before
Before you start working on an assignment, reviewing the rubric will help you understand what the components are so you can create your battle plans for completing the assignment. You’ll also see what components of the assignment are worth the most, which might help focus your attention appropriately.
Questions about something in the rubric? Ask your professor! We genuinely want to see you succeed.
During
During the writing and editing phases, it’s a good idea to check your work against the rubric to make sure you don’t leave out anything important. I recommend comparing your work to the rubric several times as you write and edit.
If you have time, wait a day after you complete an assignment, and then review it against the rubric one last time before submitting it. It’s likely you’ll catch something that you missed earlier.
After
This always surprises me a lot: some students only look at their number/letter grade, but fail to look at the rubric after their professor has evaluated the assignment. In the completed rubric, you’ll see where you did well (yay! do that stuff again) and where you fell short of the expectations (drats! now I know what to do differently next time). In addition to the checked boxes in the rubric, your professor will likely give you additional, more specific, qualitative feedback.
At Ashworth College where I now teach, students have two opportunities for success on each test/quiz and assignment. Choosing to ignore the feedback from the first submission of an assignment is unwise; your professor is pointing you in the right direction for a better grade by completing the rubric!
So what do you think? Are rubrics helpful for students? Or is this just a professor’s pipe dream? Please let me know in the Comments.