Study Group: Form a study group with others in your class to discuss complex rules and exceptions.
Abbreviations
Focus on common abbreviations like states, addresses, months and organizations.
Understand when to use an abbreviation and when to spell it out.
Numerals
Learn the rules for when to spell out numbers and when to use numerals.
Pay attention to specifics like ages, percentages and dates.
Names and Titles
Learn the AP Style guidelines for using courtesy titles.
Understand how to abbreviate academic degrees and professional titles.
Know when to use full names and last names only.
Grammar
Brush up on common grammar rules covered in AP Style.
Practice identifying and correcting grammatical errors in sample sentences.
Quiz Day Tips
In my classes, a lockdown browser is required for AP Style quizzes. Additionally, you may not use any resources while taking the quiz (including but not limited to the AP Stylebook, websites or your own notes.)
Test Your Tech: Ensure that your computer, lockdown browser and internet connection are all working well in advance. (Taking the practice quiz is a great way to do this.)
Find a Quiet Space: Choose a distraction-free environment where you won’t be interrupted during the quiz.
Read Carefully: Even in a digital format, make sure to read each question and all answer options before selecting your choice.
Pace Yourself: Time management is crucial. Keep an eye on the clock but don’t rush. My graded quizzes are 15 questions in 15 minutes.
Review: If time allows, review your answers before submitting the quiz.
If you’re preparing to take graded Associated Style quizzes, it would definitely benefit you to take a few practice quizzes first. Below are several sites with practice quizzes. NOTE: I have not verified that every quiz site has correct answers on all their quizzes, but this should give you a great, low-pressure start.
Working on a team project can be a lot of fun, but it can also be challenging. One of the biggest challenges is keeping everyone organized and on the same page. That’s where Google Drive comes in.
Google Drive is a free online storage and collaboration tool that can be a lifesaver for team projects. It allows you to create shared folders and files, which means that everyone on your team can access and edit the same documents, spreadsheets, and presentations. Plus, Google Drive keeps track of all changes made to files, so you can easily revert to a previous version if necessary.
Here are some tips for using Google Drive to organize your college public relations team project:
Create a shared folder for your project. This will be your central hub for all of your project files.
Create a subfolder structure within the shared folder to organize your files. For example, you might have subfolders for different types of files (e.g., press releases, media kits, social media posts), different team members, or different clients.
Share the folder with your team members. You can choose to give them full edit access or view-only access, depending on their needs.
Encourage your team members to use Google Drive to create and edit all of the project files. This will make it easy to keep track of all of the changes and to ensure that everyone is working on the latest version of each file.
Use Google Drive’s real-time collaboration features to work on files together. This can help to speed up the workflow and to improve communication among team members.
Here are some additional tips for using Google Drive to organize your college public relations team project:
Use descriptive file names. This will make it easy for you and your team members to find the files you need.
Use tags to organize your files. Tags are labels that you can apply to files to make them easier to find. For example, you might tag a file with the name of the client, the type of project, or the deadline.
Use Google Drive’s search feature to find files quickly and easily. You can search by file name, tag, or keyword.
Use Google Drive’s commenting feature to leave feedback on files. This can help to improve communication among team members and to ensure that everyone is on the same page.
Use Google Drive to create a shared calendar for your team. This will help you to keep track of important deadlines and to schedule meetings and events.
Use Google Drive to create a shared contact list for your team. This will make it easy for everyone to access the contact information for clients, journalists, and other stakeholders.
Use Google Drive to create a shared resource library for your team. This could include templates for press releases, media alerts, and social media posts, as well as research reports and other relevant documents.
By following these tips, you can use Google Drive to organize your team project and to share resources, which will help you to set yourself up for success in your college public relations course.
And remember, Google Drive is your friend! It’s there to help you make your life easier, so don’t be afraid to use it to its full potential.
What tips on using Google Drive for team projects do you have? Please share them in the comments.
The framework of this article was inspired by Google Bard.
In the dozens of public relations courses I’ve taught over the years, one of my students’ biggest struggles is writing using Associated Press style.
Why is learning AP style so important? PR practitioner Sandra Hernandez offers this:
PR writers really need to know the things that make them effective. I learned to write in AP in college, because it was necessary to pass the class. I continued to write in AP because I found that what I send to media had a better response rate when written in AP.
To help students learn more about AP style, I sought feedback from a variety of public relations practitioners and faculty members, trying to come up with a list of what PR writers REALLY need to know (cold, without even looking in the AP Stylebook) about AP style.
The most important (and sometimes confusing) parts of AP Style for PR writers are:
dates (especially when to abbreviate)
addresses (especially when to abbreviate)
names (when to use titles, etc.)
numerals (when to spell out, when to use digits)
datelines (which cities need to be identified with their states)
Now you have choices about how to access the AP Stylebook. You can purchase a hardcopy of the book, buy an online subscription to it or find it in your college library.
Many PR writers can also benefit from brushing up on standard grammar. My favorite site for general grammar advice is Mignon Fogarty’s Grammar Girl. I strongly recommend that you subscribe to Grammar Girl’s podcast.
So, PR pros and journalists, what would you add? What can help PR students understand what they REALLY need to know about AP style?
If you’re enrolled in a public relations course—especially if it’s among your first—you might be wondering how to best grasp the wealth of information coming your way. My advice: Start a learning journal. It’s an invaluable tool for multiple reasons, tailored here to the unique needs of a PR student.
Active Reinforcement for Better Comprehension
First off, let’s tackle reinforcement. Public relations is all about messaging and strategy. When you write down key theories or case studies, you’re not just memorizing; you’re comprehending. Remember, understanding PR tactics and strategies requires more than just passive listening or reading; it requires active engagement.
Reflection for Real-World Application
Reflection is another major benefit. The PR world is dynamic and constantly evolving. By revisiting your journal entries, you can think critically about how traditional PR theories adapt to, or diverge from, current practices. This will help you in real-world scenarios, where theoretical knowledge often needs to be applied creatively.
Identifying Gaps in Your Knowledge
Identifying gaps is crucial in a field that combines aspects of journalism, marketing and psychology. Your journal can highlight areas where you need further clarification. Maybe you’re not clear on how crisis management differs from regular PR practices, or perhaps you need to revisit the rules for an effective press release. Knowing what you don’t know is half the battle.
Exam and Pitch Preparation
Exams and client pitches have more in common than you’d think: both require succinct, effective communication. Think of your learning journal as your prep sheet. It offers an organized compilation of your learning, perfect for quick reviews before exams or client meetings.
A Treasure Trove for Your Career
For long-term benefits, your journal acts as a treasure trove (I can’t believe I actually used this term) of PR wisdom. Concepts you learn today may be relevant in your first job or even ten years down the line. Having a detailed record could be your secret weapon when you’re crafting a particularly tricky PR strategy later in your career.
Enhancing Creativity and Problem-Solving Skills
Public relations is a creative field. As you jot down insights and connect the dots between different PR elements, your problem-solving skills will naturally improve. The ability to draw connections between seemingly unrelated ideas is a hallmark of a skilled PR professional.
Personal Accountability and Professionalism
Finally, personal accountability. Being proactive in your learning will set you up for success in a field that demands initiative and responsibility. You’re not just being a student; you’re being a PR professional in training. To stay organized, add deadlines and reminders to your Google Calendar for journal reviews and course deliverables.
In conclusion, whether you’re new to the world of public relations or looking to up your game, a learning journal could be your key to success. It’s not just a study aid; it’s a long-term investment in your PR career.
Already Keep a Learning Journal?
If you already keep a learning journal for your courses, how have YOU found it beneficial? Please share your thoughts in a comment.
NOTES
The framework of this article was inspired by ChatGPT. Images were created using Adobe Firefly.
Ever wanted to email your professor but didn’t know how to hit the right note? Fear not! Here’s a quick guide to help you sound like a pro!
1. Your Email Address Matters: Be sure to use your official university email with your name in it! It’s like your virtual business card and helps your email land safely in your professor’s inbox. (Plus, if you use a personal email address, your name might not match what shows in the course roster, which will likely cause a delay in the response.)
2. Say ‘Hi’ Like You Mean It: Start with a cheerful “Hello Professor [Last Name]” or “Dear Dr. [Last Name].” It’s friendly but still shows respect.
3. Don’t Forget the Course Deets in the Subject Line: Include the course name and number. It’s like giving your professor a roadmap to your question – super helpful!
4. Ask Away! Got questions? Don’t be shy! Make them clear and to the point, so you get the answers you need, pronto!
5. Grammar is Your New BFF: Show off your writing skills with proper punctuation and grammar. It makes your email as smooth as your favorite latte!
6. Say ‘Bye’ with Style: Wrap it up with a “Thanks a million!” or “Catch you in class!” or something that resonates with you. It keeps things friendly and upbeat.
7. Give It a Once-Over: Before you hit send, read it again. It’s like checking your reflection before heading out – you want to look your best!
TIP: Why the Course Name and Number are Your Secret Weapons ?
Professors juggle a lot of classes, so adding the course name and number is like giving them a helpful nudge in the right direction. It’s like saying, “Hey, remember me? I’m in that awesome class with you!”
Wrap It Up!
Emailing your professor doesn’t have to feel like a chore. Keep it friendly, clear, and don’t forget to sprinkle in those essential details. With these tips, you’ll be rocking those academic emails in no time!
What questions do you have about writing? Or maybe you have some tips to share?
NOTES
The framework of this article was inspired by ChatGPT. Images were created using Adobe Firefly.
Hello future public relations mavens! It’s time for more writing insights specifically for you. In the dynamic world of PR, your writing needs to be impeccable. A single grammatical error can mar an otherwise brilliant press release or social media post.
Fear not! Here’s a list of common grammar errors often seen in public relations writing, and tips on how to avoid them:
1. It’s vs. Its
Error: Confusing “it’s” (it is) with “its” (possessive form of it).
Fix: Remember, “it’s” is a contraction for “it is.” If you can’t replace “it’s” with “it is,” then you should use “its.”
2. Your vs. You’re
Error: Mixing up “your” (possessive) and “you’re” (you are).
Fix: Test your sentence by replacing “you’re” with “you are.” If it doesn’t make sense, use “your.”
3. Passive Voice Overuse
Error: Using passive voice, making sentences weak.
Fix: Write in active voice to make your statements more direct and engaging. Instead of “The product was launched by the company,” say “The company launched the product.”
4. Comma Splices
Error: Connecting two independent clauses with just a comma.
Fix: Use a semicolon, conjunction, or break into two sentences. “We unveiled the new product, it was a success” should be “We unveiled the new product; it was a success.”
5. Dangling Modifiers
Error: Placing a modifier too far from the word it’s describing.
Fix: Keep modifiers close to the words they modify. Change “Walking into the room, the product caught everyone’s eye” to “As she walked into the room, the product caught everyone’s eye.”
6. Redundancy
Error: Repeating ideas unnecessarily.
Fix: Be concise. Instead of “free gift,” just say “gift.”
7. Incorrect Use of “That” and “Which”
Error: Using “that” and “which” interchangeably.
Fix: Use “that” for essential clauses and “which” for non-essential clauses. “The campaign that succeeded” vs. “The campaign, which succeeded.”
8. Wordiness
Error: Using too many words.
Fix: Be clear and concise. Instead of “due to the fact that,” simply use “because.”
9. Apostrophe Misuse
Error: Adding an apostrophe to plural words.
Fix: Remember, apostrophes usually show possession or contractions, not plurals. It’s “FAQs,” not “FAQ’s.”
10. Incorrect Parallel Structure
Error: Misaligning items in a list or series.
Fix: Make sure all items in your list follow the same structure. “Our strategy is innovative, exciting, and inspires action” should be “Our strategy is innovative, exciting, and inspiring.”
These errors might seem small, but in public relations, precision matters. Keep these common mistakes in mind as you draft and edit, and you’ll enhance both the clarity and professionalism of your writing.
Keep striving for excellence, and may your PR writing be error-free!
What questions do you have about writing? Or maybe you have some tips to share?
NOTES
The framework of this article was inspired by ChatGPT. Images were created using Adobe Firefly.
I remember the first time I was asked (told) to use a “peer-reviewed article” in my research for a paper, I had no clue what the professor was talking about. I looked around the room, and the other students in the course were either nodding along or nodding off; no one looked confused, so I decided I wasn’t going to speak up and ask what she meant.
But I didn’t want to do poorly on the assignment, so I waited until after class and went up to ask.
Thank goodness I had a kind and caring professor who was much more interested in making sure her students learned than showing how intelligent she herself was. She told me that in general, it meant that the article came from an academic or professional journal (rather than something like a popular magazine) and that the article had gone through a rigorous review process before being published. It wasn’t just the writer and editor who decided it was good enough to print; other experts in the field provide their input. (There’s a lot more to it than that, but this was a clear enough explanation to get me started.)
When I got to the library (yes, I had to physically go to the library when I was an undergrad), I went to the periodical section and took a recent Public Relations Journal off the shelf. Flipping through the journal, I realized quickly that these articles were nothing like the ones in People or Newsweek. They were written in a much (much!) more formal way, a way that would take some serious getting used to. I pored over an article, trying to make sense of it.
Then, I had an a-ha moment.
Reading a journal article is kind of like going to a new restaurant.
Should we even go here?
Now, when we explore a journal article, we want to make sure it’s a trustworthy source. Think of it like checking out a new restaurant. We’ll look at things like the reputation of the journal (like checking online reviews), the authors’ credentials (are they renowned “chefs”?), and when the article was published (fresh ingredients or stale leftovers?). There’s not really a Yelp for academic journals, but maybe that would be a fun side gig for me. But I digress.
Read the menu
Before we dig in too deep, let’s start by giving the article a quick skim. Think of it as reading the menu to see if anything catches your eye. We’ll check out the title, abstract, and headings to get a sense of what the article is all about.
Eat dessert first
Despite what your parents and grandparents might have told you as a child, it’s 100% okay to eat dessert first, at least in terms of reading a journal article. A journal article is NOT a mystery novel. You won’t ruin anything by knowing how it ends before you start. Skip to the end of the article and read the limitations and conclusions right away to see if it supports or denies the claim you are trying to make in your own research paper. (NOTE: You will want to read articles on both sides of your claim.)
Taste the app
Now, the introduction is like the appetizer that sets the stage. We’ll find out why the authors decided to do the research, what questions they wanted to answer, and why it’s important. It’s like the first taste that gets our curiosity going. Still interested? Then . . .
Sit at the chef’s table
Time to get to the juicy parts! In the methodology section, we’ll learn how the researchers cooked up their study. We’ll look at the ingredients they used (research design), how they gathered data (like secret recipes), and how they analyzed everything. We want to make sure their approach is solid and follows the rules of the kitchen; it’s like sitting at the chef’s table in the restaurant kitchen, watching how things are prepared for the diners.
Dive into the main course
Ah, the results and discussion sections, the main course! This is where the researchers present their findings and start digging into the flavors. This is the meat of the article (see what I did there?). We’ll see charts, graphs, and analysis. Then, in the discussion, they’ll interpret those results, link them to previous research, and talk about any limitations. It’s like a chef explaining the unique flavors and how they relate to other dishes.
Try an intermezzo
At a restaurant, an intermezzo is a refreshing sip or bite of a palate cleanser between courses. Reading journal articles can be heavy. If you’re feeling like your brain is getting full, get up and walk around for five minutes or watch that TikTok that your best friend just sent you. Then get back to your table.
Savor the dessert
Finally, let’s enjoy the article’s takeaway. It’s time to indulge in our own thoughts and opinions. We’ll consider what we’ve learned, how it contributes to the field, and how it might inspire our own research or practice. And don’t forget, we’re here to discuss and debate, so feel free to spice things up with your own ideas!
Yelp it
Once you’ve finished with the article, you won’t want to forget what it was about. Take the time to make notes on the article, including all the required information for an APA citation (just in case you’ll actually use it in your research) and your own paraphrased thoughts about the article. I used to use the app EndNote to keep track of information like this — it was great when I was working on my Ph.D., as I could easily find articles I’d read for previous classes using it.
A question for you: do you remember what it was like reading your first academic journal article? What advice would you give students early in their college careers on how to read one?
NOTES
The analogy comparing reading a journal article to going to a restaurant was inspired by ChatGPT. Images were created using Adobe Firefly.
Now that spring quarter at the University of Oregon has come to a close, I want to share with you a term-long project my students worked on: their blogs. For most of them, this was the first time they blogged at all, so I was especially impressed with the quality of their work.
I gave them some latitude to discuss passion projects of theirs in their blogs, so you will find topics ranging from sustainability to travel to the Kardashians!
Rather than just sharing with you a bullet point list of hyperlinked blogs, I thought you’d enjoy reading some of my favorite posts of theirs. Each blog has at least ten posts, so please take some time to scroll and click through their work.
They did a nice job of asking thought-provoking questions at the end of each of their blog posts. So if you have a few moments, it would be WONDERFUL if you’d comment on some of their posts.
If you’re a PR professor who has students blogging, what are your thoughts on ending posts with “thought-provoking questions,” those designed to promote interactivity with readers?
Image Credit: Image created by Barbara Nixon using Adobe Firefly.
In the context of blogging, categories and tags are organizational tools used to structure and classify blog content. They serve different purposes and play important roles in enhancing user experience and optimizing blog navigation.
Here’s a breakdown of what they are and why they are important:
Blog Categories
Blog categories are broad topics or themes that group together related content. They provide a high-level organization and help readers easily locate and browse specific topics of interest. For example, a travel blog may have categories like “Destinations,” “Travel Tips,” “Budget Travel,” and “Adventure Activities.” Categories are usually displayed on a blog’s main menu or sidebar, allowing visitors to explore content based on their preferences.
Importance of Categories
User-Friendly Navigation: Categories offer a structured hierarchy, making it easier for visitors to find content relevant to their interests. They save time and effort by narrowing down the scope of information.
Enhanced User Experience: Proper categorization enhances user experience by presenting information in a logical and intuitive manner. Visitors can quickly identify and access the content they desire, increasing engagement and satisfaction.
SEO Benefits: Categories can contribute to search engine optimization (SEO) efforts by providing clear topical signals to search engines. Well-organized categories with relevant keywords can improve the discoverability and visibility of a blog’s content in search engine results pages (SERPs).
Blog Tags
Blog tags are specific keywords or phrases assigned to individual blog posts to describe their content in more detail. Unlike categories, tags are more granular and focus on specific aspects or topics within a post. For instance, a blog post about “10 Essential Packing Tips for Backpacking” may have tags like “packing tips,” “backpacking,” “travel essentials,” and “travel gear.”
Importance of Tags
Content Organization: Tags allow for precise content labeling and enable visitors to explore related posts across different categories. Clicking on a tag filters the blog to display all posts associated with that particular tag, creating connections between similar content pieces.
Content Discovery: Tags facilitate content discovery by offering alternative paths to related posts beyond the main categories. Visitors interested in a specific topic can click on a relevant tag to find additional posts on the same subject matter.
SEO Benefits: Similar to categories, tags can contribute to SEO efforts by adding relevant keywords to individual posts. They help search engines understand the context and topic of the content, potentially improving its visibility in search results.
Both categories and tags contribute to a well-organized and user-friendly blog structure. They improve navigation, enhance user experience, and assist in content discovery, ultimately leading to higher reader engagement and improved search engine visibility.
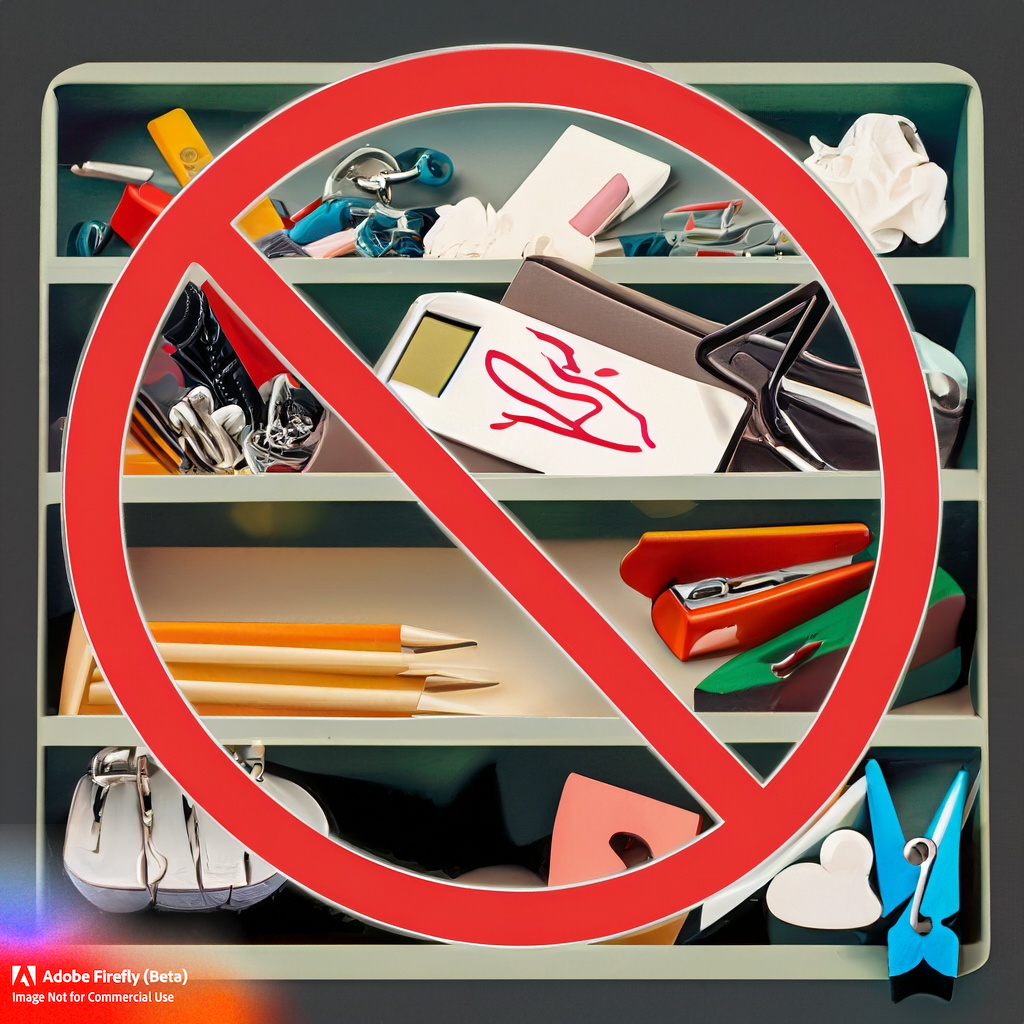
When you see a blog with posts that show as “Uncategorized,” what is your reaction? When I see “Uncategorized,” my first reaction is “Junk Drawer.”
Image Credit: Image created by Barbara Nixon using Adobe Firefly.
Disclaimer: This blog post was generated with the assistance of an AI language model, ChatGPT, developed by OpenAI. While the content was composed by ChatGPT, it is important to note that the ideas and information provided are based on its training on a diverse range of data. The post was reviewed and edited by Barbara Nixon for clarity and coherence.